Innovation happens extremely fast now and new features are being pumped out at a rapid pace. So how can you get on the frontier with your Windows devices to be able to utilize the most out of AI and Microsoft 365 Copilot and get your hands on all possible features today before they are released to the broad audience?
Typically, most customers that I work with are (by November 2025) at Windows 11 24H2, Microsoft 365 Apps for Enterprise Monthly Enterprise Channel at best and may be using Targeted release for Microsoft 365. This setup is good for the ones that follow the stream, but not so much for the people on the frontier that want to be pioneers, or even kamikazes.
To get the latest features that Microsoft write about or demos at conferences such as Ignite, you need to step up to be able to test these brand-new AI and Copilot features out yourself.
The steps to move to the frontier are five things
- Run a Windows Insider (Canary), Dev, or Beta build.
- Enable the latest features in Windows 11 (i.e., Enterprise Feature Control) and optional features.
- Run a Microsoft 365 Apps for Enterprise Beta or Current Channel (Preview) build.
- Set Targeted Release in M365 Admin Center to everyone (or alternatively select some users).
- Use Copilot+ PCs.
Two flavors – Kamikaze style or pioneer?
So just to be clear, these are my own definitions of being on the frontier. You can play safe or go totally coco-loco and do it kamikaze style. Most organizations have typical users and most also have super users or ambassadors. But if you want to truly stay ahead of the game, this is where kamikaze style users and pioneers come in. They are on the bleeding edge of technology and are adopting new AI and Copilot features as soon as they come out from the development teams at Microsoft.
| User persona: | Kamikaze style | Pioneer | Super user and ambassadors | Typical user |
|---|---|---|---|---|
| # of users | Very few | Select few | 2-3% | ~97% |
| Description | You’re on your own! This is fully unsupported. | Cutting edge but supported, safe and stable to use. | Latest and greatest amongst the production releases. | Production releases lagging one release typically. |
| Windows 11 build | Insider Dev* channel | Insider Beta channel | Latest release available | Latest release available -1 |
| Enterprise Feature Control for Windows | Enabled | Enabled | Enabled | Disabled |
| Microsoft 365 Apps for Enterprise | Beta | Current channel (preview) | Current channel | Monthly Enterprise channel |
| Microsoft 365 Release Preference | Targeted Release for Entire organization | Targeted Release for selected users | Targeted Release for selected users | Targeted Release for selected users |
| What to expect | Expect updates to both Windows and Microsoft 365 Apps every week | Updates often but less frequent than the kamikaze style. | Updates whenever they are ready and well tested, which can be multiple times per month. | This is playing safe. New features arrive once per month for Microsoft 365. |
* The canary channel can be used, but note that “some features may show up in the Dev and Beta Channels first before showing up in the Canary Channel”.
Detailed steps to enable the kamikaze or pioneer scenario
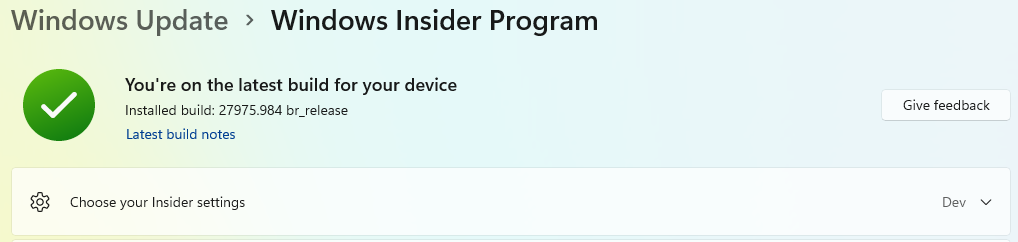
1. Run a Windows Insider build
You can opt in to Windows Insider build by going to Settings > Windows Update > Windows Insider and there opting into a channel of your choice. If you want all the details about the different options, take a peek at Start previewing Windows – explore new Windows features.
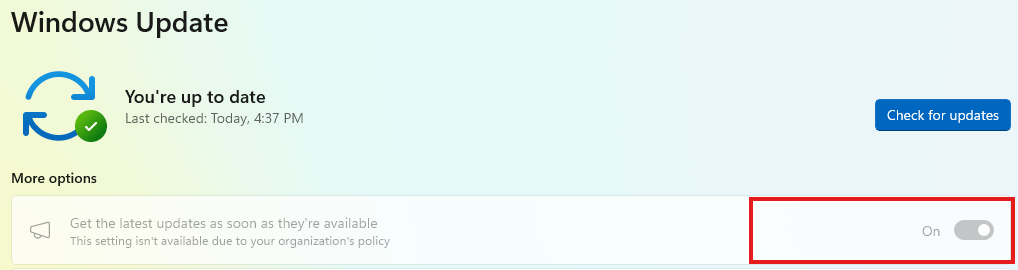
Note: Make sure to exclude the device from Autopatch (or WUfB update rings) to enable the settings, because otherwise these settings are locked down.
2. Enable Enterprise Feature Control and optional features
New major features are typically deployed as a part of each annual build of Windows, i.e., 24H2, 25H2 and so forth. However, there are features released more often than that and if you enable Enterprise Feature Control you will get the latest features regardless of if you are using the beta build och production build. More on this at Enterprise feature control in Windows 11 | Microsoft Learn.
Intune
Two settings under the Windows Update for Business category in a Settings Catalog configuration profile:
- Allow Temporary Enterprise Feature Control is set to Allowed.
- Allow Optional Content is set to Automatically receive optional updates (including CFRs).
GPOs
Two settings under Computer Configuration\Administrative Templates\Windows Components\Windows Update:
- Manage updates offered from Windows Update > Enable features introduced via servicing that are off by default = Enabled.
- Manage end user experience > Enable optional updates and set to Enabled + Automatically receive optional updates (including CFRs).
3. Run a Microsoft 365 Apps for Enterprise Insider build
If you want to learn more about the different channels in Microsoft 365 Apps for Enterprise take a peek at Compare Microsoft 365 Insider channels – Microsoft 365 Insider | Microsoft Learn.
There are multiple options to enable a new build for Microsoft 365 Apps for Enterprise, and this is the quickest one.
- Start a Command Prompt (cmd.exe) and type the following (for Beta channel):
reg add HKLM\Software\Policies\Microsoft\office\16.0\common\officeupdate /v updatebranch /t REG_SZ /d BetaChannelor this (for Current Channel (Preview)):
reg add HKLM\Software\Policies\Microsoft\office\16.0\common\officeupdate /v updatebranch /t REG_SZ /d CurrentPreview2. Finally run the update to download and change to the newest update:
"C:\Program Files\Common Files\microsoft shared\ClickToRun\officec2rclient.exe" /update userNote 1: If you haven’t excluded the device from Autopatch (or another configuration that sets the update channel) your installation will go back to whatever channel you are currently using so make sure to fix any configuration that writes updatebranch and updatepath to HKEY_LOCAL_MACHINE\SOFTWARE\Policies\Microsoft\office\16.0\common\officeupdate. The setting updatepath will need to be removed to be able to switch the channel.
Note 2: Running the above command with the switch “user” means that even though you are configured to use a proxy for users, they will most likely be able to reach out to Microsoft and update their devices even in more regulated environments.
Note 3: You can always switch back to Current Channel or Monthly Enterprise by setting the registry value to “Current” or “MonthlyEnterprise” respectively.
4. Targeted Release in Microsoft 365 Admin Center
Set your entire organization to Targeted Release in M365 Admin Center (or alternatively select some users).
In Microsoft admin center go to Settings > Org settings > Organization profile > Release preferences. Change the setting to one of the two below, whatever fits you best.
- Targeted release for everyone.
- Targeted release for select users + after saving, select the users that will go into Targeted release.
Note: As some Copilot settings are only available broadly in the entire tenant, you might want to use Targeted release for everyone in a test or dev tenant if you do not do that in the production tenant.
5. Copilot+ PCs for full Copilot experience
Some AI and Copilot features in Windows depend on the existence of an NPU, which is something that Copilot+ branded devices have. Copilot+ PCs are available from multiple vendors.
Surface devices however are the most secure and optimized for modern use as Microsoft have an advantage in developing both their own firmware but also drivers. I consider this an excellent combination, the same as Apple have with their Mac devices, as Microsoft like Apple own the hardware as well as software.
If you are not sure you have an NPU in your device, you can always have a look in Task Manager, under the tab Performance. If your device has an NPU, it will be available as an “option” there.
Summary
Staying ahead of the game is more important now than ever to stay competitive and deliver services with higher expectations. Then, can you afford to stay behind the competitors? The answer to that question is probably “no”. So, let’s bring Copilot to your work force by staying ahead of the game by running the latest code in Windows and Microsoft 365 Apps!


You must be logged in to post a comment.